Styled text vs. headings
Sighted users use visual clues such as text size, color, style, and font choice to recognize section headers in a document. Assistive technology users are also able to use section headers to navigate through a document, but only if the section headers have been set properly. If a section header has been defined only by changing how it is formatted, assistive technology is not able to tell the user that the header exists. By using heading styles, extra information is included in the document that allows assistive technology to recognize headers, indicate whether they are level one, level two, and so on, and allow the user to use them to navigate within the document.
Using headings
Headings are structured like a document outline. There should be at least one Heading 1 as the title of the document, with as many Heading 2, Heading 3, and so on as the document structure needs.
The “Title” style provided by Word should not be used, as it is not consistently recognized by assistive technology. Instead, use Heading 1 for the title of the document. You can then decide whether to use more Heading 1 headings for section headers, or whether you start with Heading 2 for top-level section headers after the title. As long as you’re consistent, either method is fine.
Setting headings
Rather than simply formatting section headings by changing the font size, style, or color, use Word’s “Style” picker in the Home toolbar to mark section headings.

To set a heading, click anywhere in the text and choose the appropriate heading from the Style picker.
You can change the way headings look if you don’t like Word’s default styles. After setting the heading level, you can change the font, size, style, and color to fit your preferences. To save your choices so that they are applied for every heading of that level in the document, select some of the text in the heading, then right-click on that heading level in the Style picker and select “Update Heading (X) to Match Selection”.
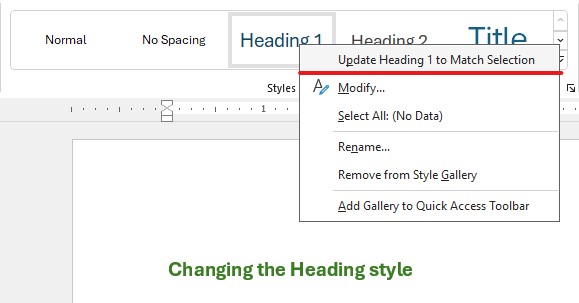
This will redefine that heading style with your design choices. This also makes it easy to change every heading in a document if you want to change your design later: Just update the style, and every heading that uses that style will automatically update to use the new design.
Reviewing your document structure
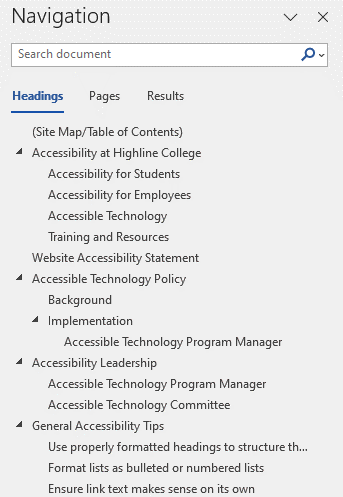
The easiest way to check to see if you have correctly used headings to define your document’s structure is to view the document outline.
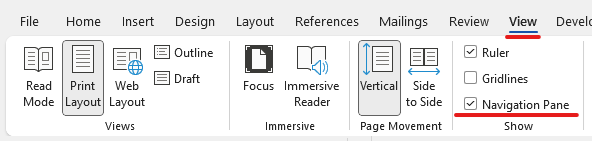
Go to the “View” ribbon and turn on the “Navigation Pane” option in the “Show” group.
This will open a pane on the left side of your document showing your document outline. If the outline makes sense, congratulations! You’re using headings correctly. If it is missing section headers, is confusing, has blank lines, or doesn’t seem to match the structure you intended to create, you will want to go back through your document to correct the heading assignments.